SOAP 2.0 | Patient Records Page
- 05 Apr 2024
- 3 Minutes to read
- Print
- DarkLight
- PDF
SOAP 2.0 | Patient Records Page
- Updated on 05 Apr 2024
- 3 Minutes to read
- Print
- DarkLight
- PDF
Article Summary
Share feedback
Thanks for sharing your feedback!
Overview
The SOAP 2.0 Patient Records page is your comprehensive hub for patient information and documentation. Here, you'll find a quick snapshot of your patient's demographics, case details, and notes, allowing for efficient management of their care journey. Need to navigate quickly? Just click the WebPT logo to return to the EMR Dashboard or use the Documentation drop-down menu for various tasks, from accessing scheduling calendars to exploring the Home Exercise Program. Dive into patient demographics effortlessly in the top-left corner, and keep an eye on alerts with the Alerts Drawer, ensuring you never miss critical information like expiring authorizations. With features like the Patient Profile section and access to patient info, managing patient data is intuitive and seamless. Keep in mind that while some features are currently in limited release, they'll be gradually rolled out to all clinics soon. From creating and viewing records to managing appointments and payments, the SOAP 2.0 Patient Records page equips you with the tools you need to deliver exceptional patient care efficiently.
Click the arrow or colorblock below to discover more.
Navigation
Navigation

- Click the webpt logo to return to the WebPT EMR Dashboard.
- Use the Documentation drop-down menu to return to the patient's chart in SOAP 1.0.
- Use the Documentation drop-down menu to view upcoming appointments in the Scheduling calendar.
- Use the Documentation drop-down menu to access the HEP, Webpt's Home Exercise Program.
- Use the Documentation drop-down menu to open the Outbound Communication Log in a new tab. Discover more about the Outbound Communication Log.
The top right portion of the header allows you to go to other clinic locations, the Tasking application, your Templates and Profiles, our ideas portal, and to our knowledge base.
![]()
- Click the Tasking Icon to go to Tasking. Discover more about Tasking.
- Click your name or initials to go to Templates and Profiles, the Knowledge Base, or the Ideas Portal.
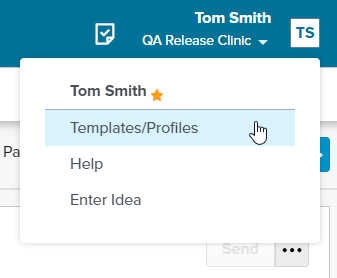

- Discover more about Templates.
- Discover more about the WebPT Discover knowledge base.
- Discover more about the Ideas Portal.
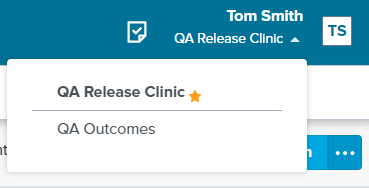
- Click the name of the clinic to go to other clinics that both the patient and your webpt user profile has access to.

Demographics
Demographics
View patient demographic information in the top-left portion of the header.

Alerts Drawer
Alerts Drawer
The Alerts Badge appears next to the patient’s demographic information. Clicking on the badge opens the Alerts Drawer and displays any patient-related alerts, like expiring authorizations. You can even add custom alerts.
Discover more about alerts.

Patient Profile
Patient Profile
Use the Patient Profile section to access relevant patient information. Clicking each link will take you to different sections of the patient's profile.
This feature is in limited release for specific users and will be gradually rolled out to all clinics over the next few weeks.

Select Patient Info to access the Patient Info page in the webpt EMR. From here, you can add or edit the patient's demographic information.
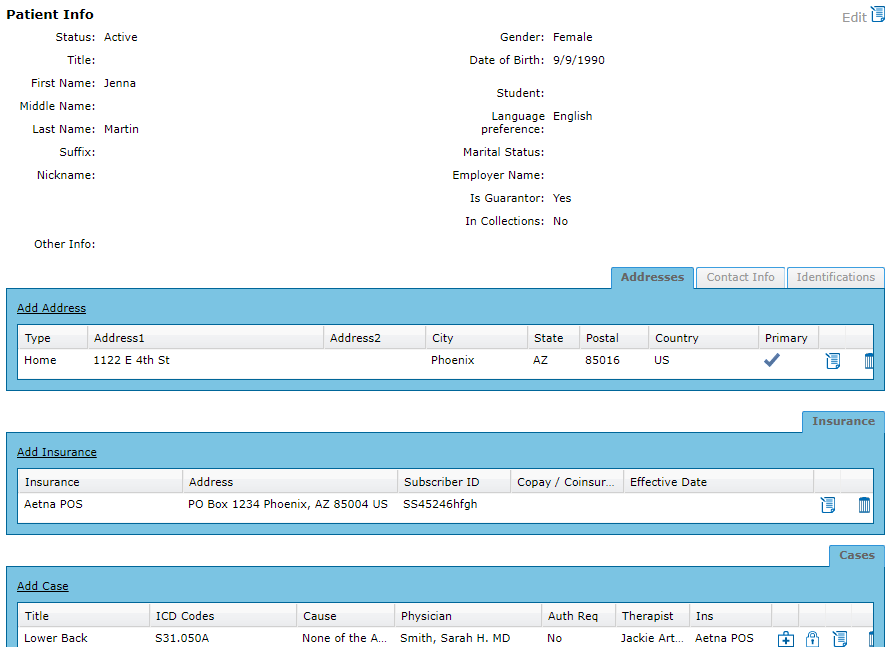
The Records page is the default selection. From here, you can create, view, fax, print, or addend notes from this section.
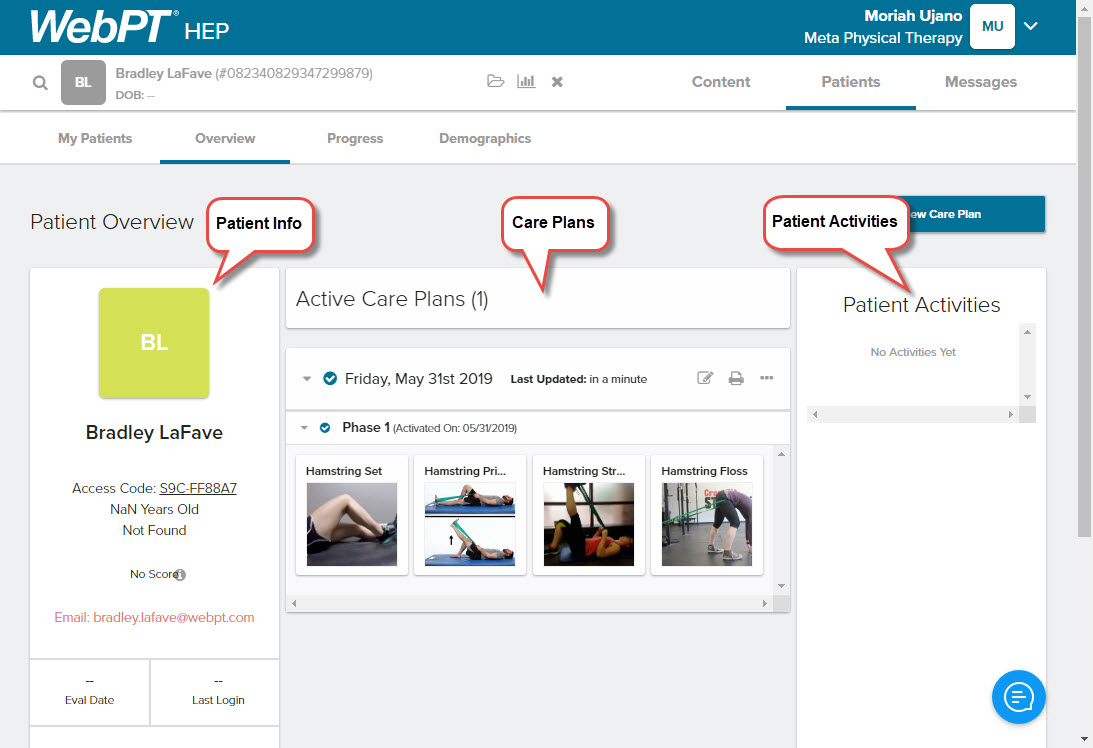
Select HEP to launch the Home Exercise Program platform in a separate window. If the patient already has a plan set up, you can add or edit the exercise from here.
Select eDocs to add, view, or edit external patient documents. Discover more about eDocs.
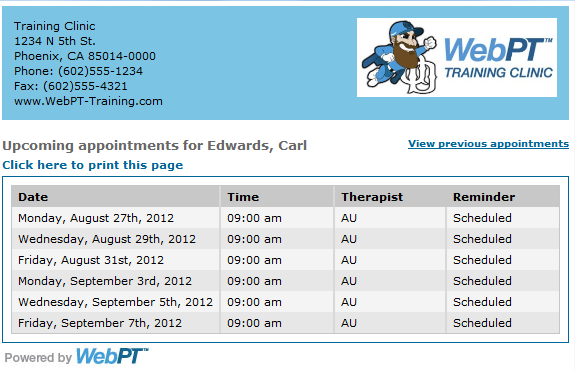
Select Appointments to view upcoming and previous appointments in a separate window. From here, you can print the appointment list containing important dates, times, and therapists.
Select Payments to add a new payment or view a history of payments.


Case Drawer
Case Drawer

Case Summary
Case Summary
Below the Case Badge is the Case Summary. This section contains relevant information about your patient and their current episode of care. This section remains open as you document. Select the available arrows to view additional details relevant to the patient's case.
Medicare Patients
The POC Date Range only appears in the Case Summary for Medicare type patients.
Discover more about the Case Summary.

Records Section
Records Section
You can create, view, fax, print, or addend notes from this section. Documentation finalized in 1.0 can be viewed by expanding The notes below were created in an older SOAP version subsection. These notes are viewable but cannot be faxed or batch printed.

Was this article helpful?