SOAP 2.0 | Initial Evaluation
- 05 Apr 2024
- 6 Minutes to read
- Print
- DarkLight
- PDF
SOAP 2.0 | Initial Evaluation
- Updated on 05 Apr 2024
- 6 Minutes to read
- Print
- DarkLight
- PDF
Article Summary
Share feedback
Thanks for sharing your feedback!
Overview
Every new case kicks off with an IE, and getting started is a breeze. Just click the Click here to document faster button on the Patient Chart within the WebPT EMR, your gateway to efficient documentation and patient care in SOAP 2.0. From there, you'll land on the SOAP 2.0 patient’s Records page where you can review case details and previous notes. Whether you're adding standard notes or customizing with additional content, our intuitive interface streamlines the process. Plus, with features like SOAP Navigation Tips and automatic saving, you can focus on what matters most—providing exceptional care.
Click the arrow or colorblock below to discover more.
Start the Initial Evaluation
Start the Initial Evaluation
Click the Click here to document faster button to go to SOAP 2.0 from the Patient Record page in the Webpt EMR.

You'll arrive at the SOAP 2.0 patient’s Records page. You can view information about the patient’s case and previously created notes. Discover more about the Records Page.
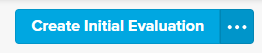
Click Create Initial Evaluation to begin documenting for this patient.
- You can click the (...) menu if you want to add a different type of note by choosing from the available options. These note options vary based on the existing completed notes in the patient's case.
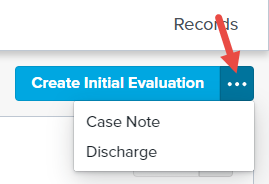
- You can click the (...) menu if you want to add a different type of note by choosing from the available options. These note options vary based on the existing completed notes in the patient's case.
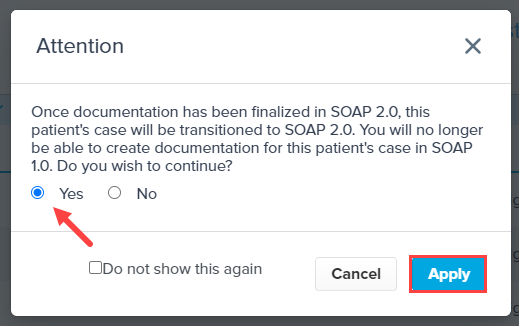
Confirm you want to begin documenting in SOAP 2.0 (this process is irreversible). Select the Yes radio button and click Apply to continue to the note. You can select the Do not show this again checkbox if you don’t want to be prompted each time you begin a new SOAP 2.0 case.
Click the (...) menu and select Add Content to add a Profile. Discover more about Profiles.
Use the Eval/Note Profile search to select your desired profile and click Apply. The Add Content window also allows you to add additional content subsections to the note that are not on the existing Template or Profile.
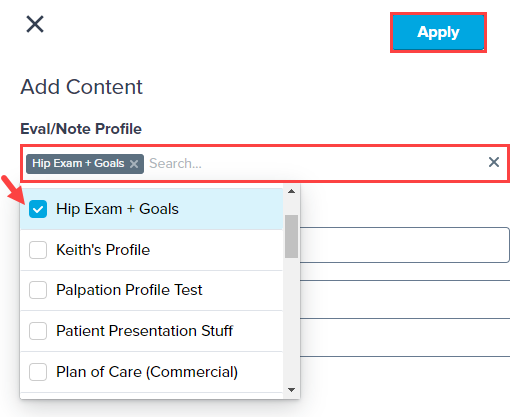


Discover more about Adding Profiles to your Note.
Discover more about addint Subsections to Notes.
SOAP Navigation Tips
You can use your mouse or keyboard to move through the fields and sections of the note.
- Use the Tab key to move across and down between fields.
- Press the Shift + Tab keys at the same time to move back or up fields.
- Use the Arrow keys to move through multi-select lists, pressing the Enter key to make your selections.
Subjective Section
SOAP 2.0 | Subjective Section
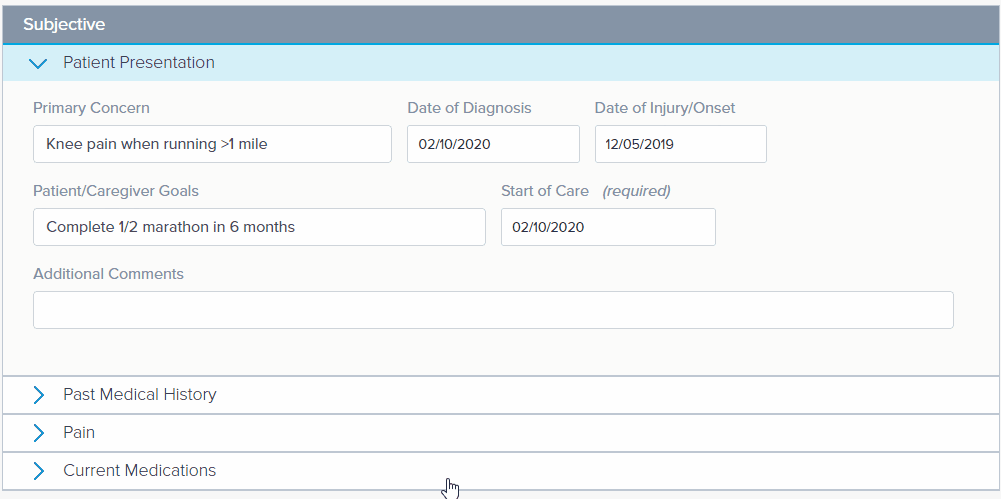
You can enter information about your patients, including their Social and Medical History in the Subjective section.
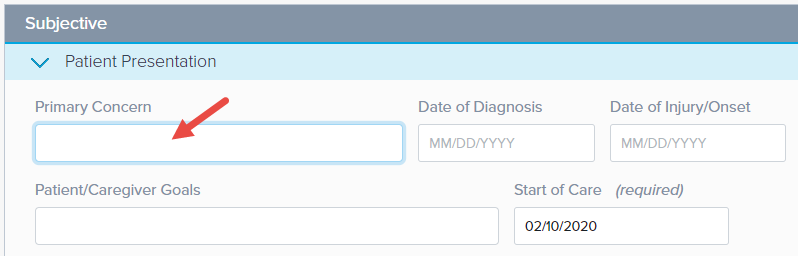
The note begins with the Patient Presentation subsection in Edit mode. Edit mode is when a subsection is open and ready for data entry. Be sure to include the required field: Date of Injury/Onset.
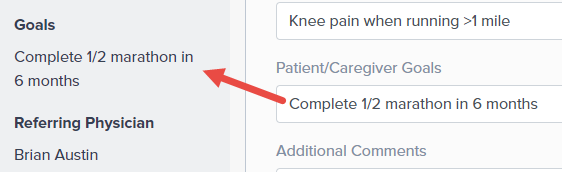
The data entered in the Patient/Caregiver Goals section populates automatically in the Goals section of the Case Summary.
Opening the next subsection automatically closes the previous section, enabling Read-mode. Read mode automatically hides empty fields and clearly displays fields containing data.


SOAP Tips
Select the different letters on the SOAP bar (on the left) to automatically go to that section.

Objective Section
Objective Section
Summarize your findings in the Objective section.
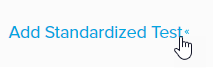
You can add Standardized Tests by clicking the Add Standardized Test+ link and selecting the test from the drop-down menu.
 Scores
Scores will not auto-calculate.
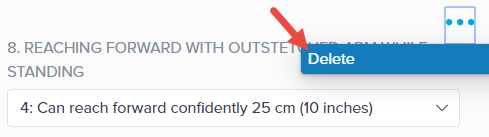
Added a test on accident?Simply click the Menu (...) and select Delete to remove it.
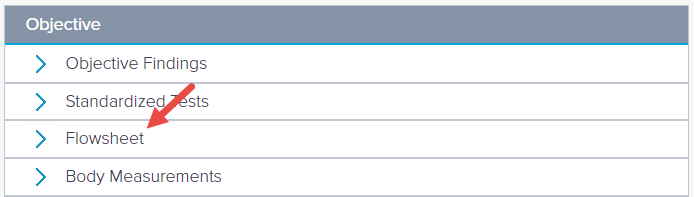
Use the Flowsheets subsection to add in your patient exercises. If you’re documenting your Flowsheet on paper right now, this functionality is ideal for you. Discover more about Integrated Flowsheets.


Assessment Section
SOAP 2.0 | Assessment Section
Enter your Diagnosis, Areas of Concern, and related Goals in the Assessment section.
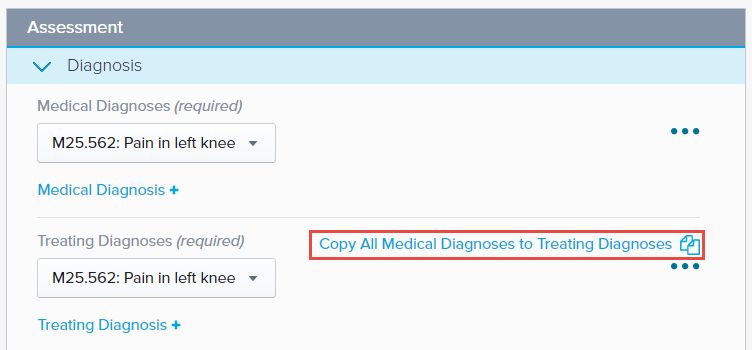
The Medical Diagnosis and Treating Diagnosis are required fields. The Medical Diagnosis pulls from the diagnoses entered on the patient’s case. Opening this section allows you to enter additional Medical and Treating Diagnoses, and even copy your Medical Diagnoses to your Treating Diagnoses.
The Diagnosis section also allows you to enter any factors, complicating or supportive.
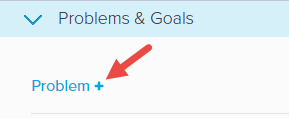
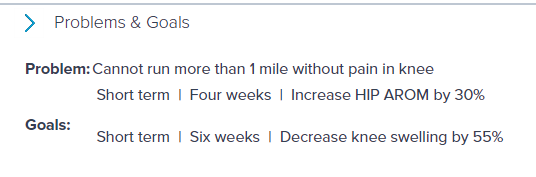
In the Problems & Goals section (Areas of Concern & Goals for Habilitative profile patients), click Problem+ to start adding a problem. This section allows you to list your patient’s problems and then add related goals.
Click Goal+ to add one or more goals for each problem.
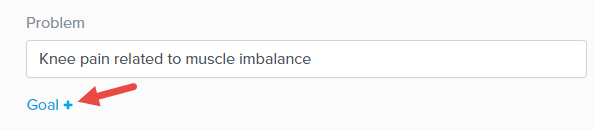
You can add one or many related goals to each Problem (or Area of Concern).


SOAP Tips
Your note automatically saves every minute.

Plan Section
SOAP 2.0 | Plan Section
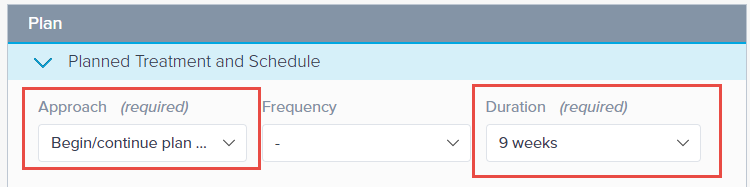
You can detail the patient’s treatment plan in the Plan section. This is also where you will create the Plan of Care for your Medicare patients.
You must include an Approach and Duration for patients with Medicare insurance.
Leverage Profiles to automatically select Planned Procedures when the profile is loaded, or select them from the drop-down menu. Discover more about Advanced Profiles.

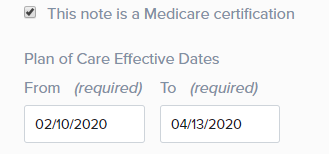
You must select the This note is a Medicare certification checkbox to create a Plan of Care.
 Effective Dates
Your Plan of Care Effective Dates are grayed out until the box is selected. Checking this box also updates the title of the note to Initial Evaluation - Certification.
Once the checkbox is selected, the From date automatically sets to the current date. The To date automatically populates based on the Duration chosen in the Planned Treatment and Schedule section.


Charge Summary Section
SOAP 2.0 | Charge Summary Section
You can enter charges based on the performed procedures, or you can choose not to bill for this visit in the Charge Summary. This billing information is included in the finalized note, eliminating the need for a separate Daily Note. This is an improvement over the current SOAP 1.0 configuration.
Select CPT Code+ link to add a charge. Indicate the CPT Code and then select the appropriate Modifiers, enter Minutes, and/or Units. Discover more about the Charge Summary and its functionality.
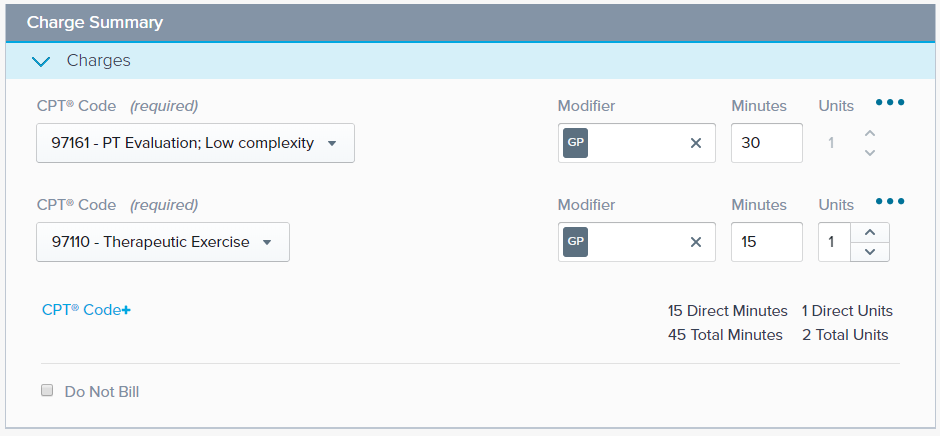
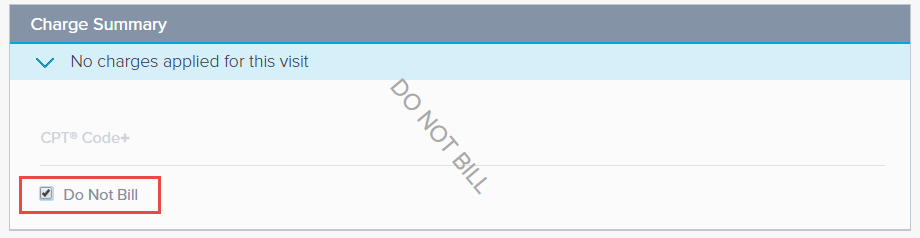
If you don’t want to bill for the visit, check the Do Not Bill box. The Charge Summary section acts as a record of the procedures performed during the visit.


A Note About Charges
SOAP 2.0 automatically prioritizes CPT codes based on Planned Procedures.
If the insurance payer on the patient's case has Additional Modifiers designated in Insurance Settings, then the additional modifiers are available for selection in the SOAP 2.0 Charge Summary. Discover more about Insurance Payer Settings.
A 59-modifier is automatically applied on designated CPT codes as indicated by the CCI Edits setting in Insurance Settings. You will be unable to de-select these modifiers from the Modifier drop-down menu. Discover more about CCI Edits and Modifier 59.
Therapy modifiers (GP, GN, or GO) are automatically applied to CPT codes if the patient's insurance on the case has Apply Therapy Modifiers selected in their insurance settings. You will not be able to de-select these modifiers from the Modifier drop-down menu. Discover more about GP/GO/GN Therapy Modifiers.
Signing the Note
SOAP 2.0 | Signing the Note
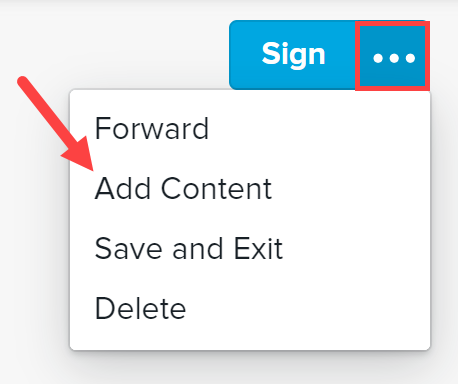
When you are finished with the note, you can click Sign at the top of the page, or use (...) the secondary action menu to select another option.

Once you sign your note, the application automatically checks the following are present before finalizing:
- Date of Visit
- Start of Care
- Medical and Treatment Diagnosis Codes
- A Standardized Test (Medicare-only)
- Charge Summary (either CPT Code(s) or selecting Do Not Bill)
If all items are present, the note will be signed and saved into the patient’s records.
Was this article helpful?